Struggling with dry, cracked skin? Discover this simple, effective DIY remedy to restore softness and hydration naturally!
Are you tired of dealing with dry, cracked skin that feels uncomfortable and irritated? You’re not alone. Millions of people struggle with skin that lacks moisture, especially during colder months or in harsh weather conditions. But the good news is that you don’t have to rely on expensive skincare products filled with chemicals. Instead, you can make your own natural, nourishing remedy using simple ingredients from your kitchen.
In this ultimate guide, we will explore everything you need to know about dry skin, including its causes, the best ingredients for hydration, and a step-by-step DIY remedy to restore your skin’s natural glow. Whether you’re looking for relief for your hands, feet, elbows, or entire body, this guide is for you. Let’s dive into the world of natural skincare!
Understanding Dry, Cracked Skin
What Causes Dry Skin?
Dry, cracked skin can be a frustrating issue, making daily activities challenging. It often appears on areas of the body that lack sufficient natural oils, such as the hands, feet, elbows, and knees. Understanding the causes of dry skin is the first step in treating it effectively. Here are some common culprits:
- Environmental Factors: Cold weather, low humidity, and excessive sun exposure can strip moisture from your skin, leaving it dry and irritated.
- Harsh Soaps & Frequent Washing: Many soaps and cleansers contain harsh chemicals that remove the skin’s natural oils, leading to dryness.
- Nutritional Deficiencies: A lack of essential fatty acids, vitamins, and hydration can contribute to dry skin. Omega-3 fatty acids, vitamin E, and water are crucial for maintaining healthy, hydrated skin.
- Medical Conditions: Skin conditions such as eczema, psoriasis, and diabetes can cause excessive dryness and require special care.
- Aging: As we age, our skin produces less oil, making it more prone to dryness.
Essential Ingredients for Your DIY Remedy
When crafting a DIY remedy for dry skin, selecting the right ingredients is crucial for restoring moisture and promoting healing. Here are the key ingredients you should include:
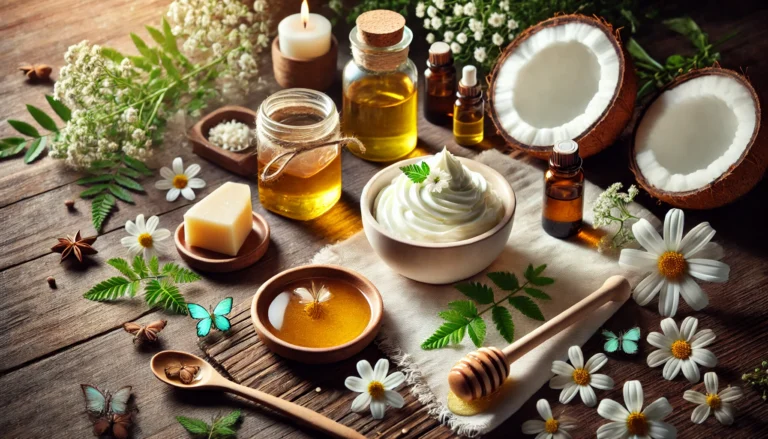
1. Coconut Oil
- Packed with fatty acids that deeply penetrate the skin, coconut oil provides intense hydration and creates a protective barrier against moisture loss.
- Contains antimicrobial properties that help prevent infections in cracked skin.
2. Shea Butter
- Renowned for its rich emollient properties, shea butter nourishes and soothes dry, cracked skin, making it a powerhouse for repair.
- Contains vitamins A and E, which are essential for skin healing and rejuvenation.
3. Honey
- A natural humectant that attracts moisture into the skin, honey enhances hydration and soothes irritated skin.
- Contains antibacterial and anti-inflammatory properties, making it perfect for sensitive or damaged skin.
4. Carrier Oils (Jojoba, Almond, or Olive Oil)
- Help to deliver essential nutrients into the skin while sealing in moisture.
- Jojoba oil mimics the skin’s natural sebum, making it highly effective in hydration.
5. Essential Oils (Lavender, Chamomile, or Tea Tree)
- Provide a soothing fragrance while offering additional skin benefits.
- Lavender oil helps calm irritated skin, while tea tree oil has antimicrobial properties to prevent infections.
Step-by-Step Guide to Creating the Ultimate Moisturizing Treatment
Ingredients Needed:
- 1 cup shea butter
- ½ cup coconut oil
- ½ cup carrier oil (jojoba, almond, or olive oil)
- 2 tbsp honey
- 5-10 drops of your favorite essential oil (optional)
Instructions:
- Melt the Shea Butter: In a double boiler, melt 1 cup of shea butter until it becomes a liquid.
- Add Coconut Oil: Stir in ½ cup of coconut oil and mix well until fully combined.
- Blend in Carrier Oil: Remove from heat and add your choice of carrier oil, stirring thoroughly.
- Incorporate Honey: Stir in 2 tablespoons of honey for an extra boost of hydration.
- Add Essential Oils: If desired, mix in a few drops of essential oils for fragrance and additional skin benefits.
- Cool & Store: Pour the mixture into a clean container and allow it to set completely before using.
How to Apply the DIY Remedy Effectively
To maximize the benefits of your homemade moisturizer, applying it correctly is key. Follow these steps for the best results:
1. Prep Your Skin
Before application, cleanse your skin thoroughly to remove dirt and oils. This ensures that your moisturizer penetrates effectively.
2. Apply Generously
Take a sufficient amount of the DIY remedy and warm it between your palms. Apply it evenly over the targeted areas, focusing on dry patches.
3. Massage Gently
Use circular motions to massage the moisturizer into your skin. This enhances absorption and stimulates circulation, promoting healing.
4. Seal in Moisture
After applying your remedy, lock in hydration by covering the treated area with a breathable fabric, such as cotton gloves or socks for overnight healing.
Additional Tips for Healthy, Hydrated Skin
1. Stay Hydrated
Drinking plenty of water throughout the day helps keep your body and skin hydrated from the inside out.
2. Eat Skin-Friendly Foods
Incorporate foods rich in omega-3 fatty acids, such as walnuts and flaxseeds, to support skin health.
3. Use a Humidifier
Maintaining indoor moisture levels can prevent excessive dryness, especially during winter months.
4. Avoid Hot Showers
Opt for lukewarm water instead, as hot water can strip your skin of its natural oils.
5. Exfoliate Regularly
Gently exfoliate once a week to remove dead skin cells and enhance moisture absorption.
Frequently Asked Questions
Can I Use This Remedy on Sensitive Skin?
Yes, but it’s best to do a patch test first. If irritation occurs, discontinue use or try milder ingredients like aloe vera instead of essential oils.
How Often Should I Apply This Remedy?
For best results, apply at least twice daily—morning and night.
Is This Remedy Safe for Children?
Yes, this remedy is safe for children, but avoid essential oils if using it on infants.
How Should I Store Leftover DIY Remedy?
Store it in an airtight container in a cool, dark place to maintain its freshness.
What Should I Avoid After Applying the Remedy?
Avoid harsh soaps, excessive sun exposure, and tight clothing that may irritate the skin.
Final Thoughts
Achieving soft, hydrated skin doesn’t have to be complicated or expensive. With this DIY remedy, you can nourish and protect your skin naturally. Incorporate this treatment into your daily routine, and you’ll notice a significant difference in your skin’s texture and health.
If you love natural skincare, save this guide for future reference and share it with others who need it. Stay healthy, stay radiant, and embrace your natural glow!